 Save to Pinterest
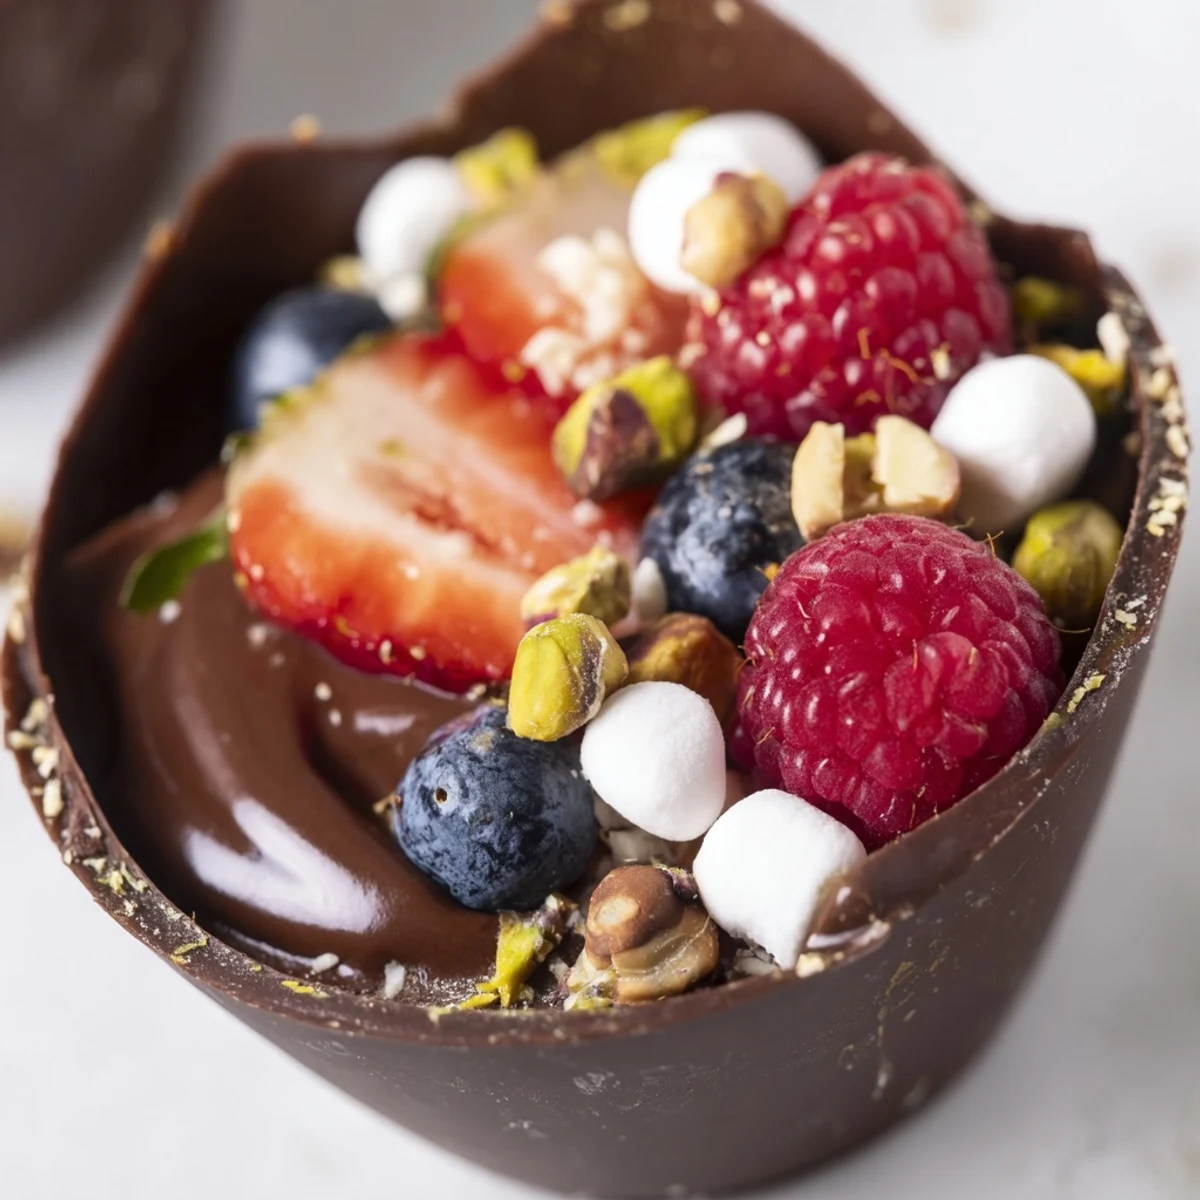
 Create stunning chocolate grazing cups with edible chocolate shells filled with silky smooth chocolate mousse. These individual desserts feature layers of rich, creamy mousse topped with fresh mixed berries, crunchy chopped nuts, fluffy mini marshmallows, and elegant chocolate curls. Perfect for dessert tables, dinner parties, or special celebrations, these impressive cups come together in just 25 minutes of active preparation time. The homemade chocolate cups provide a dramatic presentation while the velvety mousse delivers pure chocolate indulgence in every bite.
The first time I made chocolate cups, my kitchen smelled like a patisserie for hours. I'd planned an intimate dinner party and wanted something that felt extravagant without requiring professional skills. Those little edible vessels held everything together and somehow made the evening feel more special than it actually was.
Last Valentine's Day, I set up a grazing table with these cups as the centerpiece. My friend Sarah actually gasped when she walked in and assumed I'd ordered them from some fancy boutique. Watching everyone customize their own toppings became its own little party activity.
Ingredients
- Dark chocolate: Choose something you'd eat plain since the flavor really shines through
- Heavy cream: Very cold cream whips up faster and holds its structure better
- Fresh berries: Mix colors for visual impact and varying sweetness
- Chopped nuts: Toast them lightly to bring out their natural oils
- Mini marshmallows: These add playful texture that guests always gravitate toward
Instructions
- Melt and coat the cups:
- Work quickly once your chocolate is melted and let the excess drip off for even, delicate shells
- Whip the mousse base:
- Fold gently to keep air in the mixture and stop when no streaks remain
- Fill and decorate:
- Pile toppings high and dont worry about perfection, the rustic look is part of the charm
 Save to Pinterest
 My niece helped me make a batch for her birthday and took such pride in arranging each topping. She told me the gold leaf made her feel like a proper pastry chef, and honestly, I felt pretty fancy too.
Making Them Your Own
White chocolate cups with raspberry mousse became my summer go to after experimenting one hot afternoon. The color contrast against fresh mint leaves was almost too pretty to eat.
Timing Is Everything
I once assembled these too early and the chocolate softened from the mousse moisture. Now I make the cups and mousse ahead but only combine them about two hours before guests arrive.
Setting The Scene
Arrange these on a mirrored tray or slate board for maximum visual impact. Create small clusters of three cups with different garnishes so guests can choose their own adventure.
- Set out small tongs or spoons for self service
- Keep extra toppings on the side for those who want to customize
- Have a damp cloth ready for chocolate fingers because this gets messy
 Save to Pinterest
 Every time I serve these, someone asks for the recipe like it's some family secret. The truth is, they're just stunningly simple and that's exactly what makes them perfect.
Recipe FAQs
- → How far in advance can I make these chocolate cups?
-
These chocolate grazing cups are best made on the day of serving for optimal texture and freshness. The chocolate cups can be prepared up to 2 days ahead and stored in an airtight container at room temperature. The mousse can be made 1 day in advance and refrigerated. However, once assembled, the cups should be served within a few hours as the moisture from berries and mousse may soften the chocolate shells over time.
- → Can I use different types of chocolate for the cups and mousse?
-
Absolutely! While dark chocolate provides the most intense flavor and holds its shape well, you can experiment with milk or white chocolate for both the cups and mousse. Keep in mind that white chocolate is softer and may not form as sturdy cups. You could also create a stunning presentation by alternating dark chocolate cups with white chocolate mousse, or vice versa for a beautiful contrast.
- → What other toppings work well with these cups?
-
The beauty of grazing cups lies in their versatility. Beyond the suggested toppings, try adding crushed cookies, pretzels for salt contrast, dried fruits like cranberries or cherries, shredded coconut, or even candy pieces. For a more sophisticated approach, consider adding candied citrus peel, crystallized ginger, or flavored whipped cream dollops on top.
- → My chocolate cups keep breaking when removing liners. What am I doing wrong?
-
Chocolate cups can be delicate. Ensure your chocolate layer is thick enough—at least 2-3mm. Make sure the chocolate is completely set before attempting to remove liners. If using paper liners, try peeling them away slowly from the top edge downward. Silicone liners work beautifully as they release more easily. If still having trouble, try placing the set cups in the freezer for 5-10 minutes before removing liners—the cold makes them more firm and less prone to cracking.
- → Can I make these without special cupcake liners?
-
Yes! While cupcake liners provide the most consistent shape, you can use small silicone molds, mini tart pans, or even create freeform cups by painting melted chocolate onto the inside of small bowls or ramekins. For a unique presentation, try using small cocktail glasses as molds—paint chocolate around the inside, chill, then gently release. You could also simply pipe mousse into purchased chocolate cups or shot glasses for a similar effect with less effort.