 Save to Pinterest
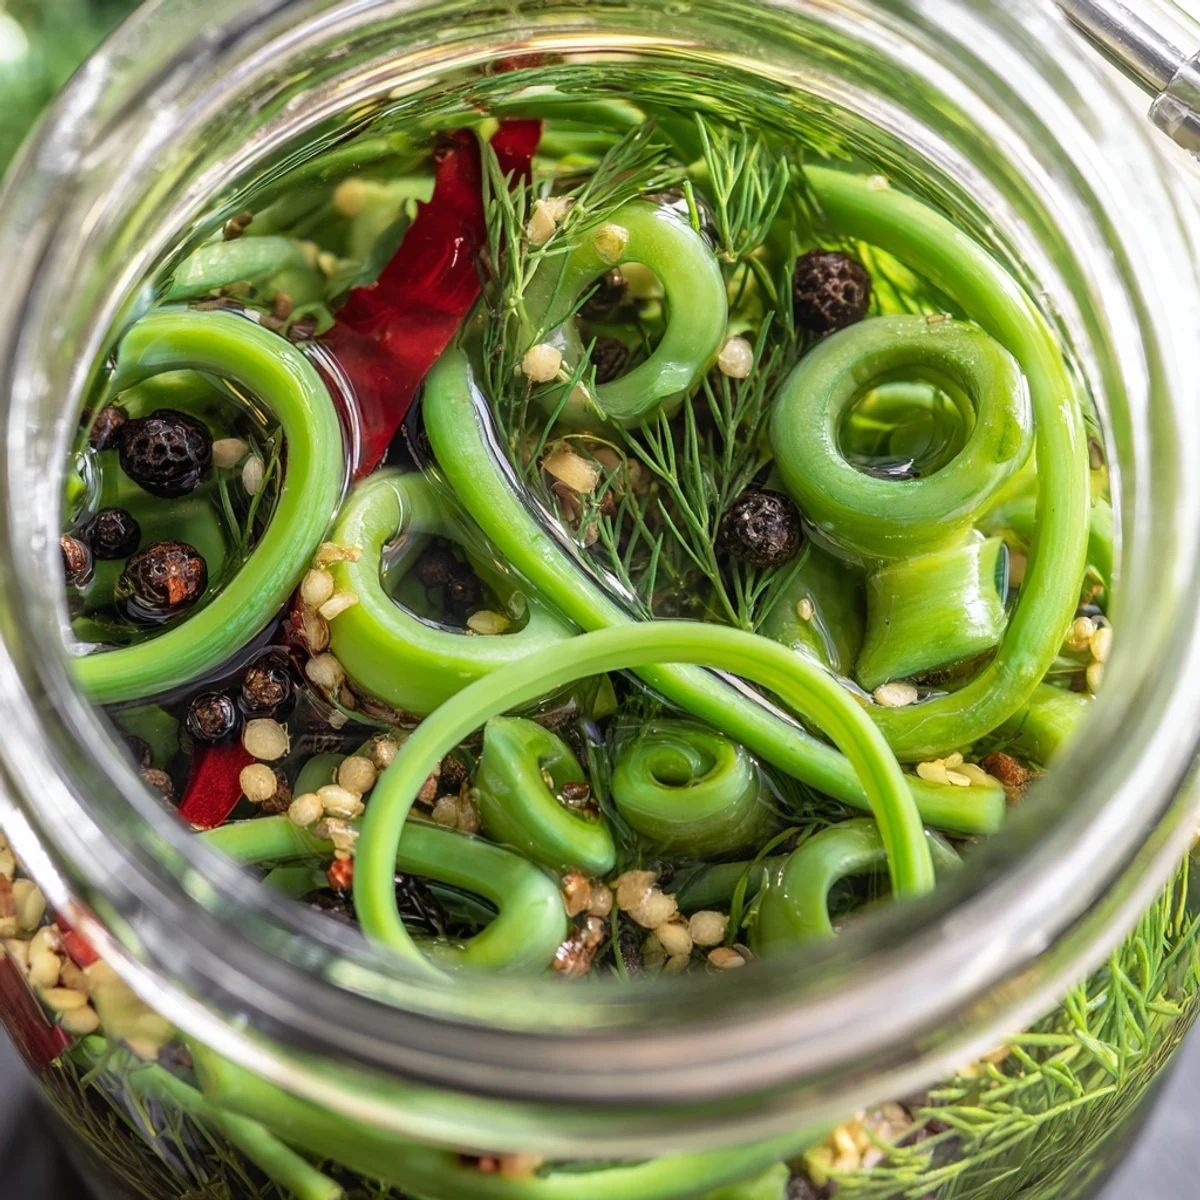
 Create a tangy, bold preserve featuring fresh garlic scapes submerged in a spiced vinegar brine. These crunchy pickles deliver heat from dried chilies and red pepper flakes, balanced by aromatic coriander, mustard seeds, and black peppercorns. The brine combines white vinegar with water, sugar, and salt for classic pickling flavor that intensifies over time. Ready in 25 minutes plus 48 hours minimum pickling, these scapes develop deeper complexity after one week. Perfect alongside grilled meats, on charcuterie boards, or chopped into sandwiches and salads for zesty crunch.
My farmer's market vendor handed me a tangled bunch of these curly green stems with a knowing grin. 'People walk right past these,' she said, 'but they're missing out on garlic's best kept secret.' I took them home, made my first jar that afternoon, and now I'm the person hoarding scape season every June.
Last summer I brought a jar to a dinner party where nobody knew what garlic scapes were. Within an hour, the jar was empty and three people were texting me for the recipe. The host confessed she ate three straight from the jar while standing at her open refrigerator at midnight.
Ingredients
- 300 g fresh garlic scapes: Look for tightly curled bright green stems without any yellowing or soft spots from farmers markets in early summer
- 250 ml distilled white vinegar: The clear vinegar keeps your pickles looking gorgeous unlike cider vinegar which can darken the scapes over time
- 250 ml water: This dilutes the vinegar just enough so the acid does not overpower the delicate garlic flavor
- 2 tbsp granulated sugar: A subtle sweetness that balances the sharpness and helps the brine penetrate the scapes evenly
- 1 tbsp kosher salt: The coarse texture dissolves beautifully and gives that classic pickle tang we all crave
- 1 tsp black peppercorns: These add a gentle warmth that builds slowly in the background
- 1 tsp mustard seeds: They pop between your teeth and release this incredible aromatic quality when you bite into a scape
- 1 tsp coriander seeds: Slightly citrusy and floral they lift the whole pickle out of ordinary territory
- 1/2 tsp red pepper flakes: Start here and adjust upward if you like things genuinely spicy
- 2 small dried chilies: Tuck these in for a slow burn heat that sneaks up on you
- 2 bay leaves: Earthy and savory they tie all the spices together beautifully
- 4 sprigs fresh dill: Optional but adds that classic pickle flavor profile everyone recognizes immediately
Instructions
- Get your jars ready:
- Wash everything in hot soapy water then sterilize by boiling for 10 minutes or run through a hot dishwasher cycle. Clean jars prevent any unwanted bacteria from crashing your pickle party.
- Prep the scapes:
- Trim the woody ends and cut stems to fit your jars leaving about an inch of headspace. They can curl a bit which actually looks gorgeous through the glass.
- Pack everything tight:
- Divide scapes dill sprigs and dried chilies between your jars using clean hands to tuck them in snugly. Tight packing means fewer floaters and better flavor distribution.
- Add the spice magic:
- Split the peppercorns mustard seeds coriander red pepper flakes and bay leaves evenly between both jars. Layer them throughout so the spices infuse from multiple angles.
- Make the brine:
- Combine vinegar water sugar and salt in a saucepan over high heat. Stir until the salt and sugar completely dissolve then remove from heat immediately.
- Pour and seal:
- Carefully ladle hot brine into each jar ensuring scapes stay fully submerged. Leave half an inch at the top screw on lids and let everything cool to room temperature before refrigerating.
- Practice patience:
- Wait at least 48 hours before cracking open your first jar though a full week develops the most complex flavor. They keep beautifully for a month in the fridge.
 Save to Pinterest
 My neighbor now requests a jar every June as her birthday present. She eats them straight from the jar while watching cooking shows claiming they are better than anything she has seen made on television. It has become our annual summer ritual that I genuinely look forward to.
Choosing The Best Scapes
The tightest curls with the brightest green color yield the crispest pickles. I have learned that scapes with straight sections tend to be older and slightly tougher. If you find them at a market ask when they were harvested since freshest means best texture in your final jar.
Flavor Variations That Work
Sometimes I add a few slices of fresh ginger for an Asian inspired twist that pairs beautifully with grilled fish. A star anise pod creates a lovely licorice undertone that surprises people. For something completely different try adding a cinnamon stick to the spice mix.
Serving Ideas Beyond The Jar
Chop them finely and mix into softened cream cheese for the most incredible bagel spread you have ever tasted. Layer them on turkey sandwiches instead of regular pickles for a serious upgrade. Toss diced pieces into potato salad for a bright garlicky kick that wakes up the whole dish.
- Tuck whole scapes alongside grilled salmon for an impressive presentation
- Mince and stir into homemade salad dressings for instant complexity
- Use the brine to quick pickle sliced radishes or cucumbers after the scapes are gone
 Save to Pinterest
 There is something deeply satisfying about preserving a fleeting seasonal ingredient that most people overlook. Every time I open a jar months later I am transported back to that first market morning when I discovered these curly green stems that changed my pickling game forever.
Recipe FAQs
- → How long do pickled garlic scapes last?
-
When properly refrigerated, these pickled scapes maintain optimal quality for up to one month. The vinegar brine preserves them effectively while keeping the crunch intact.
- → Can I adjust the spice level?
-
Absolutely. Increase dried chilies or red pepper flakes for more heat, or reduce them for a milder version. The spices distribute evenly throughout the brine.
- → What's the minimum pickling time?
-
Allow at least 48 hours for the scapes to absorb the brine and develop flavor. For best results and deepest flavor penetration, wait one week before opening.
- → Can I add other vegetables?
-
Sliced carrots, radishes, or even pearl onions pickle beautifully alongside the scapes. Just ensure all vegetables stay submerged in the brine.
- → Do I need to process these in a water bath?
-
No water bath canning is required. Simply sterilize jars, pack with scapes, pour hot brine over, seal, and refrigerate. This creates quick pickles meant for cold storage.
- → What can I serve with pickled garlic scapes?
-
These add tangy crunch to charcuterie boards, cheese plates, grilled meats, sandwiches, salads, or enjoy straight from the jar as a zesty snack.